Getting started with AI on Zenifra
This guide shows how to generate your credential, limit usage with a budget, and make the first call using an OpenAI-compatible client.
Prerequisites
- a Zenifra account
- access to the Zenifra console
- available credit, including promotional credits when granted
- a Python project with the
openaipackage installed - an environment variable to store the key
Step 1: Create the API key
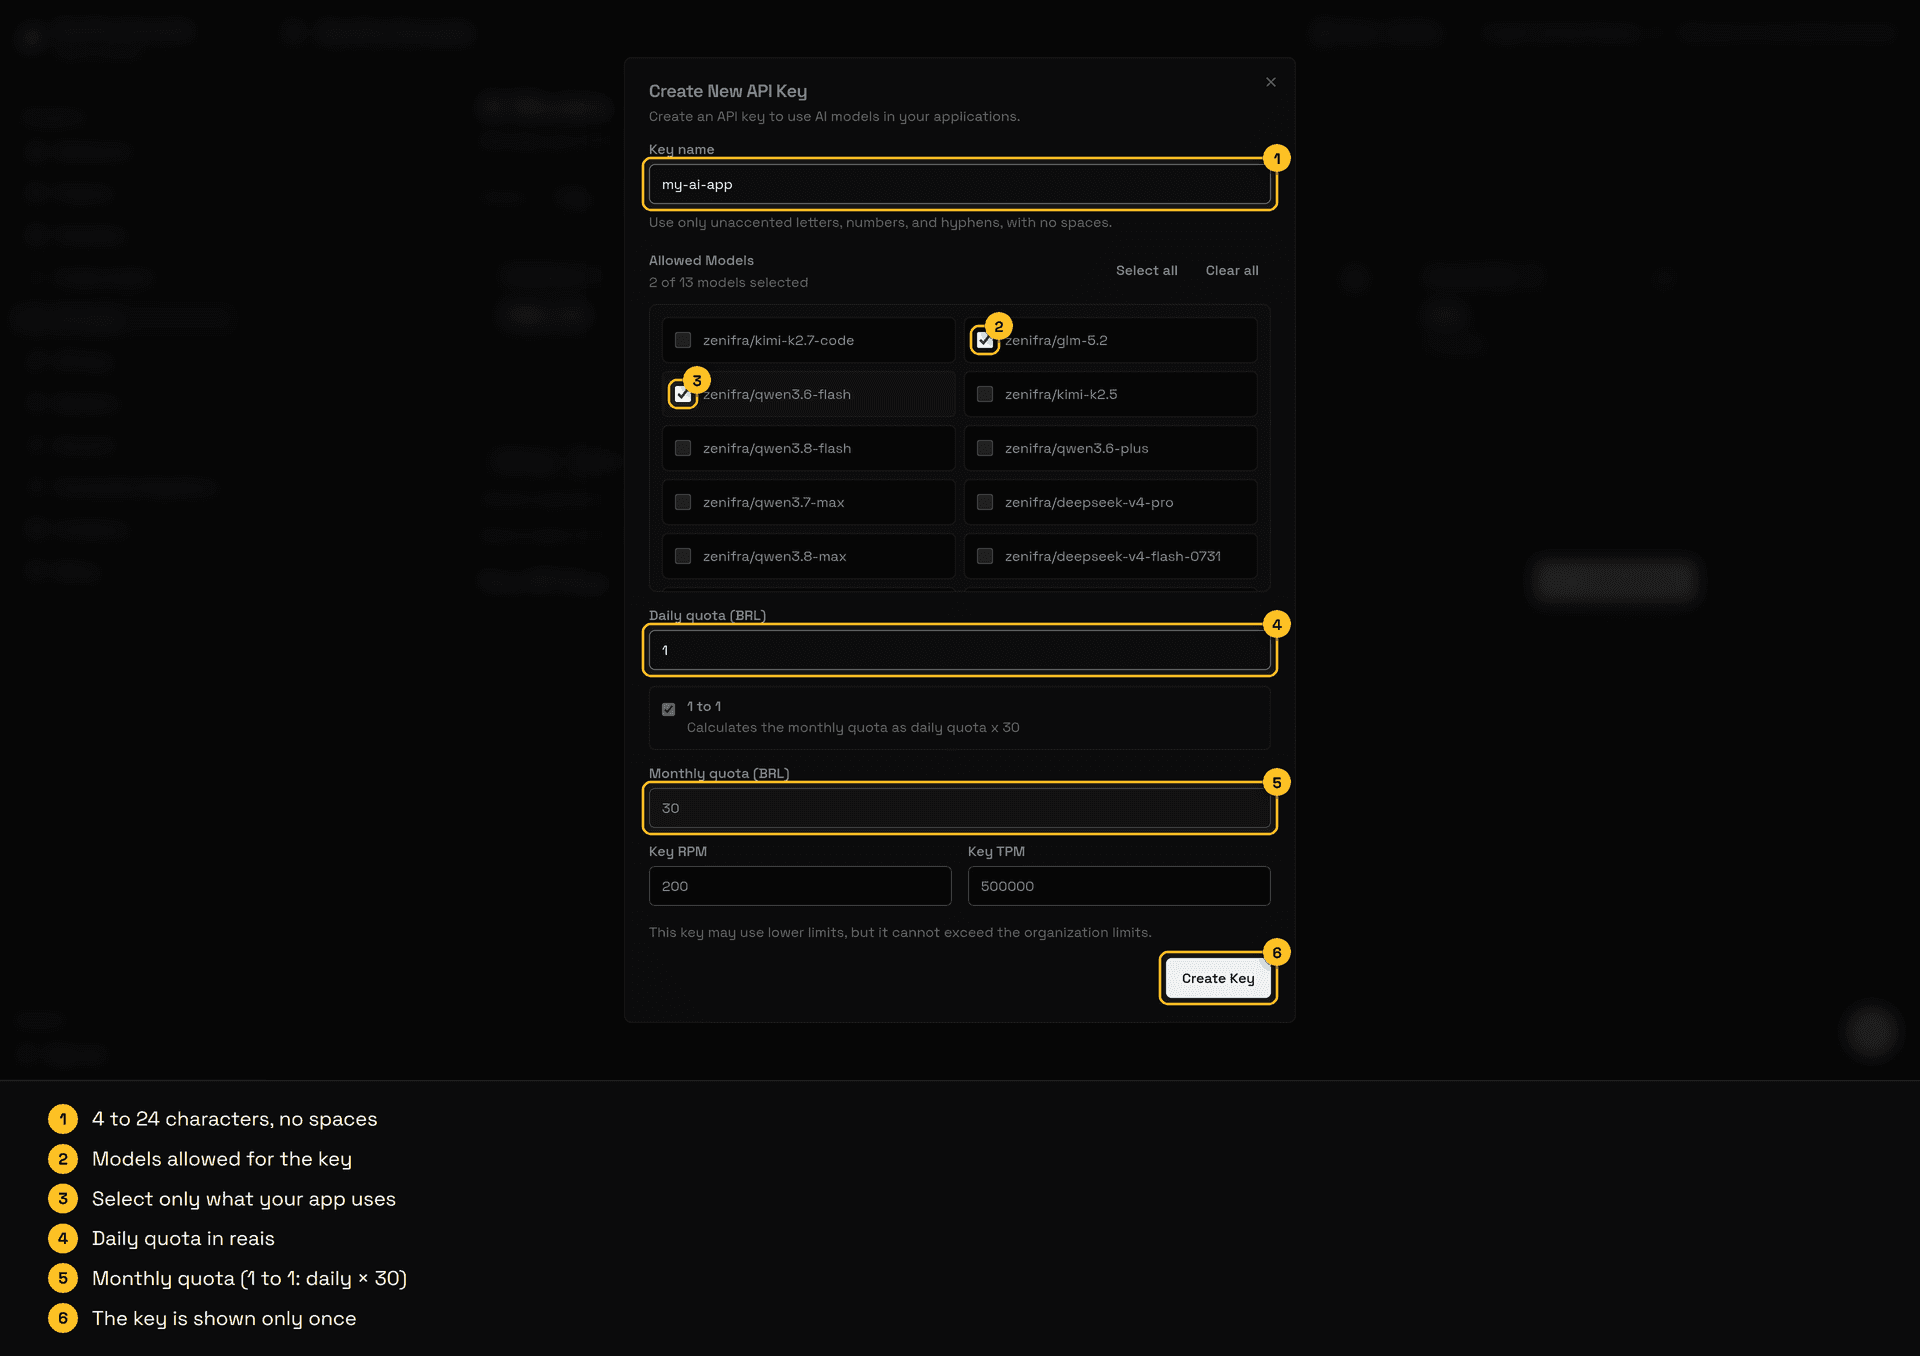
In the Zenifra console, open AI Models, click Create API Key, and enter a name that identifies the environment, application, or team that will use the key. The name accepts 4 to 24 characters and may contain only unaccented letters, numbers, and hyphens, with no spaces, such as production-api-01.
Required permissions
For AI operations through a user session, an owner has full access; assistant and member need the organization grants. For automation, organization API Keys use the AI key ID:
| Action | Minimum scope |
|---|---|
| Create an AI key | ai_key.create on organization:* |
| Read a key | ai_key.read on ai_key:<key-id> |
| Change the budget | ai_key.update on ai_key:<key-id> |
| Remove/deactivate a key | ai_key.delete on ai_key:<key-id> |
| Read usage and costs | ai_usage.read on ai_key:<key-id>; use * only for all permitted keys |
The scopes above are independent: creating a key must not be treated as authorization to read usage for other keys. The key used by the client for ai.zenifra.com is an inference credential separate from the organization API Key.
Keys belong to the organization but retain their creator link. Removing a member from the organization automatically deactivates the AI keys created by that member.
This key will be used by your application to authenticate calls to the https://ai.zenifra.com/v1 endpoint. The secret is shown only once after creation; copy it and store it securely like any other production secret.
Step 2: Define budget and allowed models
When creating the key, you can define an additional cost limit and select which models it can access. This limit never increases the organization's available credit.
This flow is useful to separate usage by environment, team, or integration.
Step 3: Make the first request
Install the OpenAI SDK in your Python project:
pip install openaiThen use the example below. For this documentation, we will use the alibaba/qwen3.6-35b-a3b model, if it is enabled for your key in the console:
import os
from openai import OpenAI

client = OpenAI(
    base_url="https://ai.zenifra.com/v1",
    api_key=os.environ["ZENIFRA_AI_API_KEY"],
)

response = client.chat.completions.create(
    model="alibaba/qwen3.6-35b-a3b",
    messages=[
        {
            "role": "user",
            "content": "What is the average temperature in southern Brazil?",
        }
    ],
)

print(response.choices[0].message.content)
Step 4: Track usage and costs
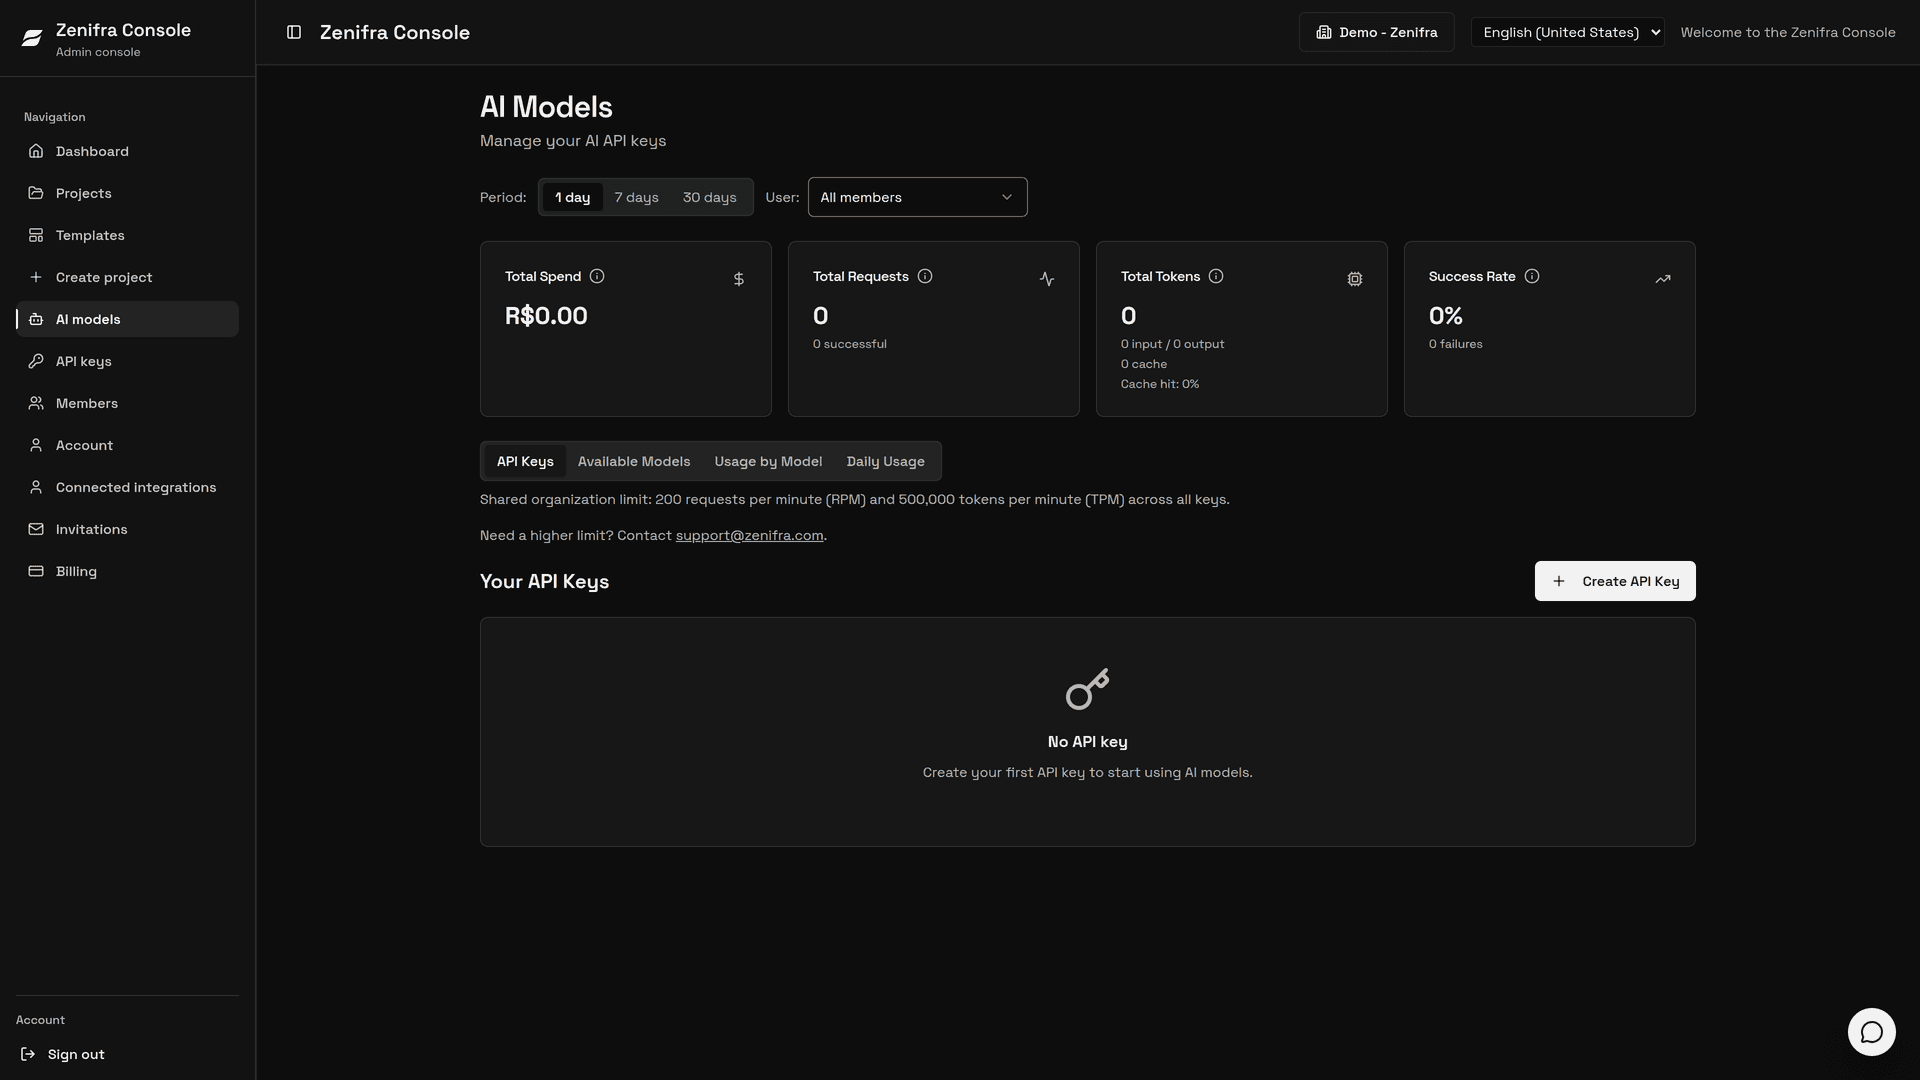
In the console, you can view:
- daily costs
- total costs
- usage by model
- current models
- created keys
How billing works
AI usage can be billed by tokens, images, or another unit identified by the catalog. Token-based models can have a standard (peak) price, an off-peak price, and context tiers selected by the input-token count. Review AI model pricing and the Console before shipping integrations to production.
AI usage is prepaid and uses the organization's shared credit. When no usable credit remains, new calls are blocked. A saved card does not enable additional AI usage.
New users receive R$30.00 in promotional credit, with limited spots, while the promotion is available. This credit can also be used with the AI offering.
FAQ
Do I need to use the OpenAI SDK?
Not necessarily. The important part is to use a client compatible with the OpenAI API and configure base_url and api_key correctly.
Where can I track current models and prices?
In the console, in the AI Models area.
Can I limit the use of a key?
Yes. The key creation flow lets you define a cost budget and select which models it can access.
Next steps
Last updated on